The editor
The editor opens after every recording. You can also open any MP4 or MOV: drag it onto VeyFrame, press ⌘O, or choose Open With → VeyFrame in Finder.
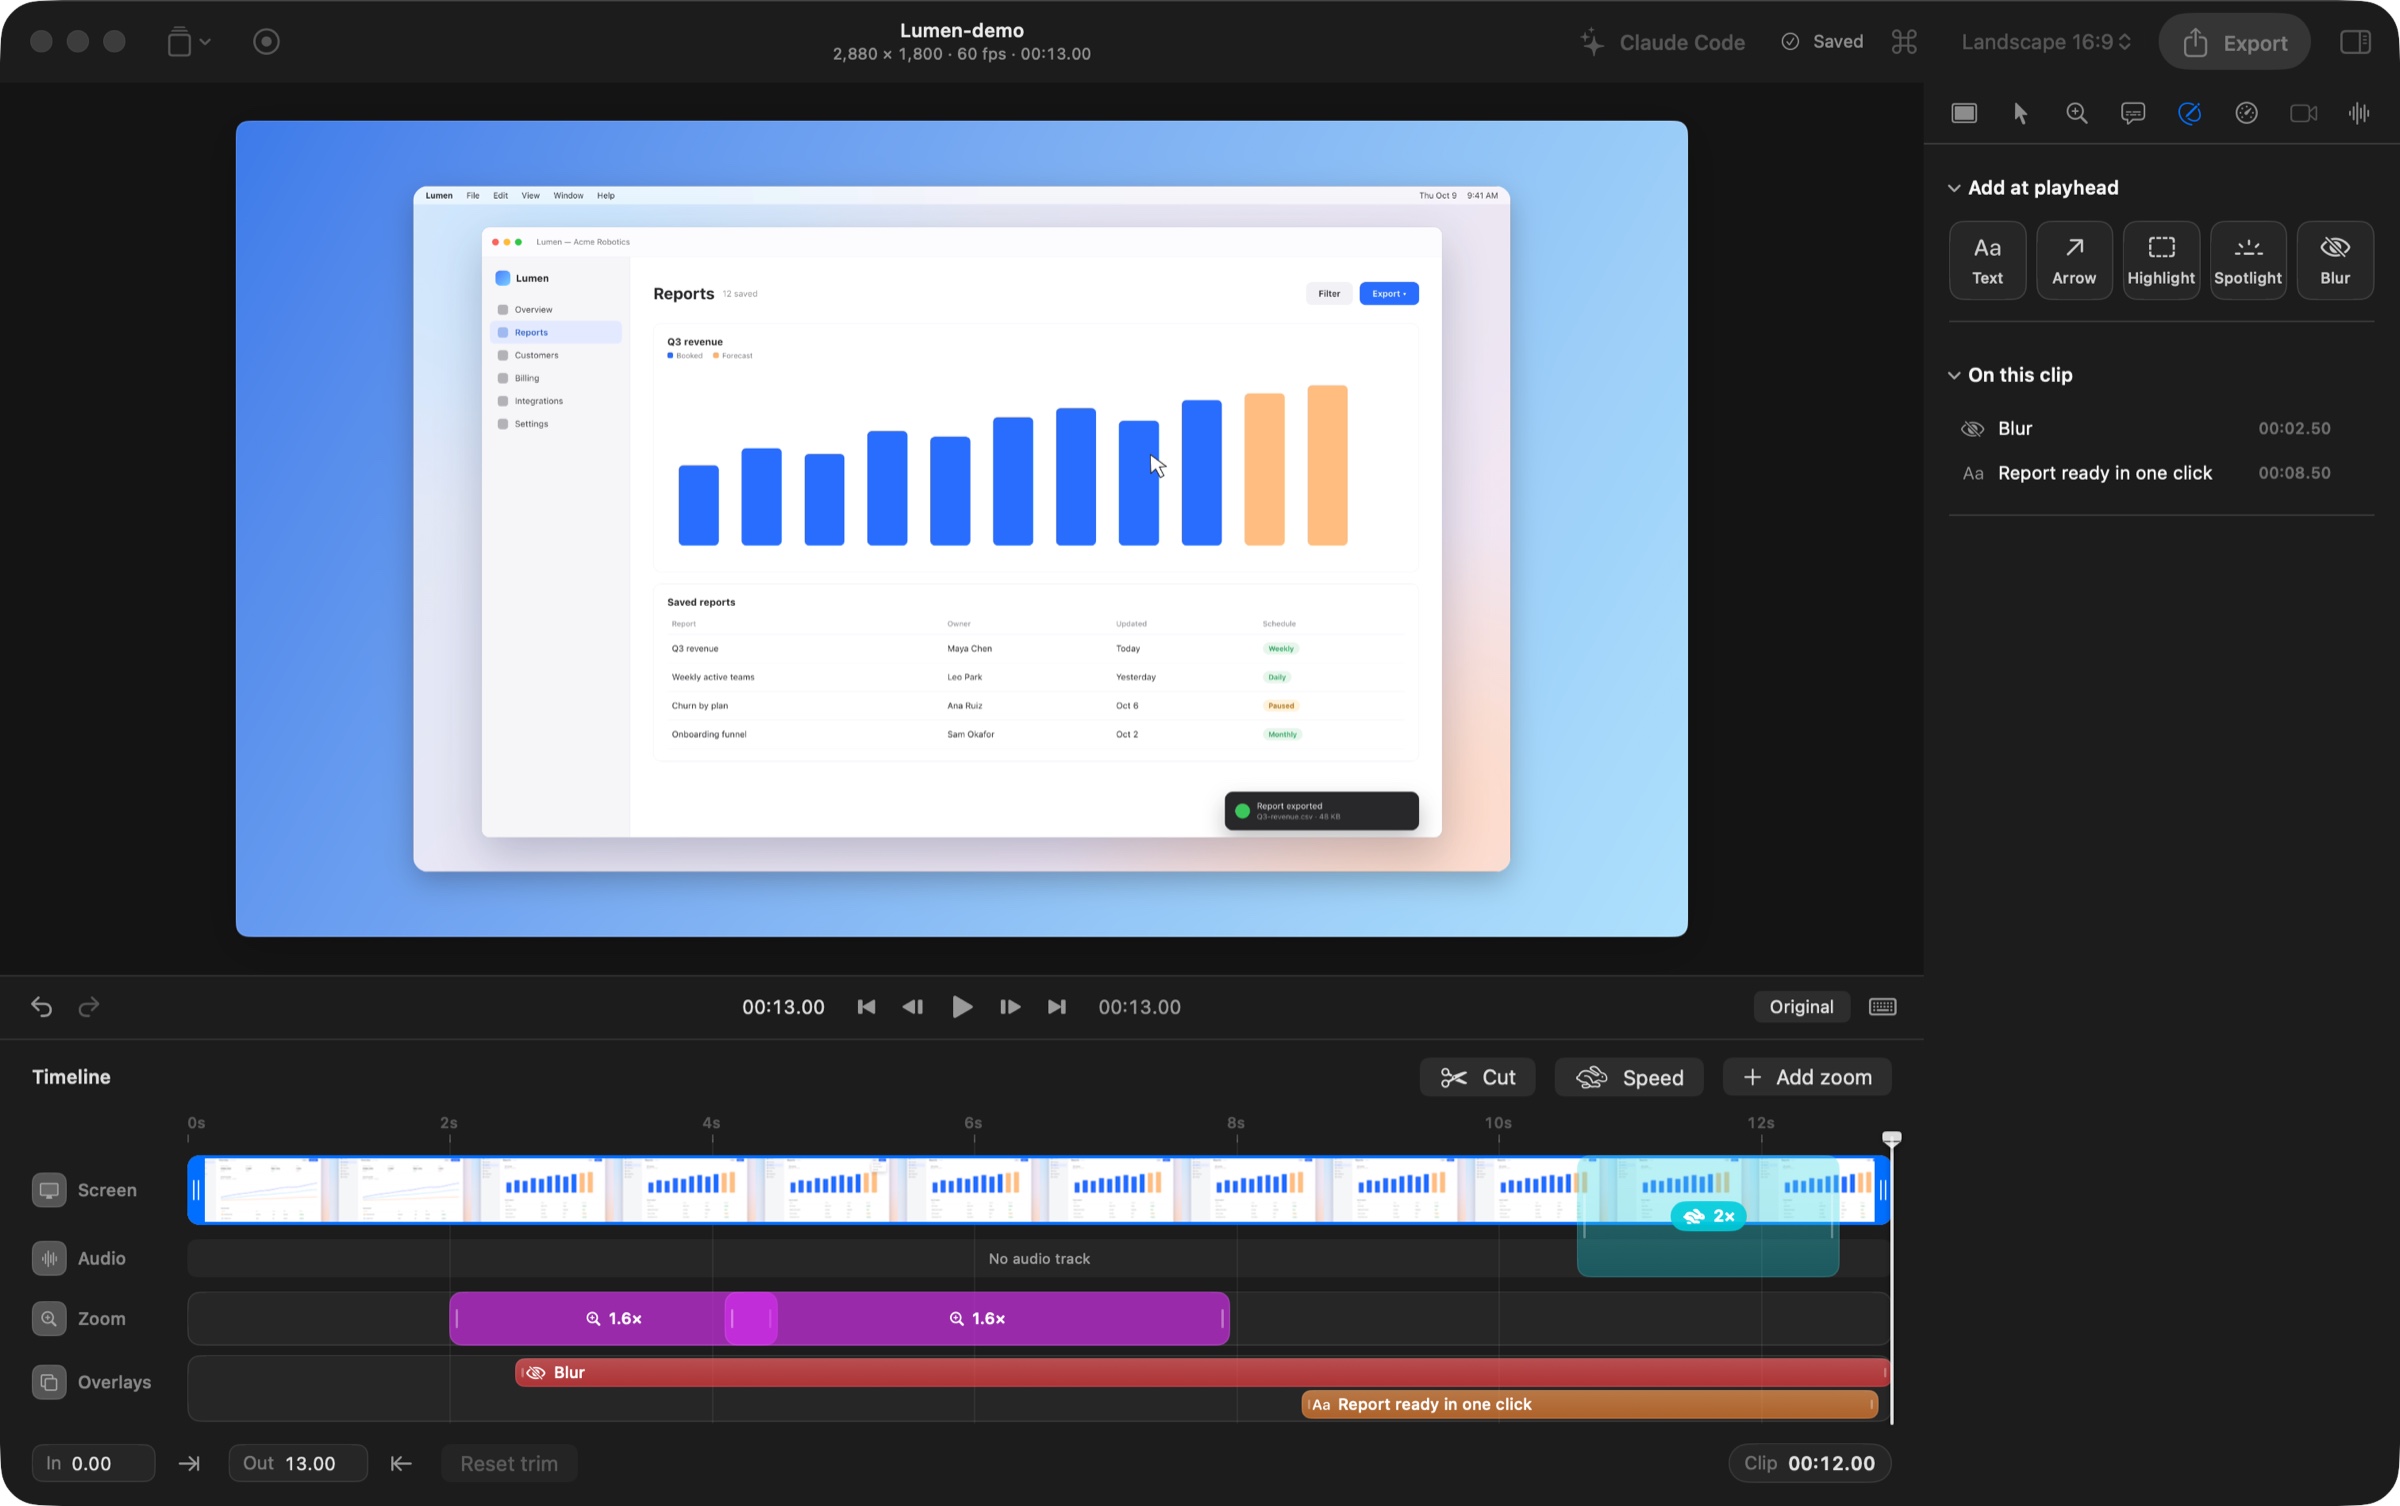
Layout
- Preview shows the finished video, exactly as it will export.
- Playback bar under the preview: play, step frames, the time, and Original to compare with the unedited recording.
- Timeline at the bottom, with lanes for the screen, audio, captions, zooms, and overlays.
- Inspector on the right (⌥⌘I), with tabs for Frame, Cursor, Zoom, Captions, Annotate, Timing, Camera, and Audio.
The timeline
Click or drag the ruler, filmstrip, or waveform to move the playhead. Each lane has its own color:
| Block | Color |
|---|---|
| The kept clip and its trim handles | Your accent color |
| Zooms | Purple |
| Speed sections | Teal |
| Captions | Blue |
| Annotations | Orange (blurs are red) |
| Camera layouts | Pink |
| Cuts | A red ✂ marker |
Every block can be selected, dragged, resized from either edge, and deleted with ⌫ or its right-click menu.
Command menu
Press ⌘K and type to find any action: export, zooms, cuts, captions, canvas shapes, pointer styles, and more.
Saving and undo
Edits save automatically a moment after you stop changing something; the toolbar shows Saved. Every change can be undone with ⌘Z, and a whole drag counts as one step. The original recording is never modified.
Library
The Library (⇧⌘L) lists your recordings and exports with search and filters. Renaming a recording renames its companion files too, and Move to Trash keeps them together. Combine clips… joins recordings, each with its own edits, into a new one, with a cut or crossfade between them.